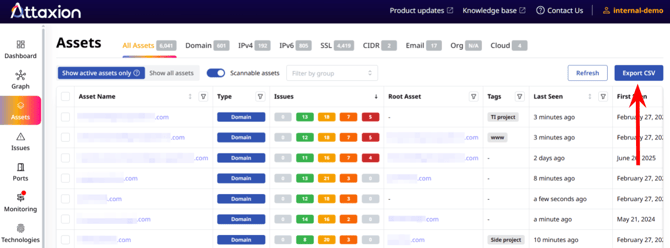
When you select “Assets” in the menu on the left, you’ll see a list of all assets that Attaxion has discovered so far (or that you have added manually as root assets).
What is There in the “Assets” Tab
Attaxion detects assets of various types, including domains and subdomains, IPv4 and IPv6 addresses, SSL certificates, etc. Refer to this article to learn more about asset types.
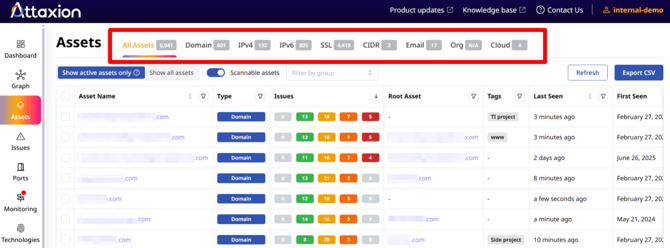
In the “Assets” tab, at the very top you can see how many assets of each type you have in your external attack surface.
In the list below, you can either view the entire list of assets or sort them by type, selecting one or several types that you’re interested in (click on the funnel icon next to “Type” to do so).
For each asset, in the “Issues” column Attaxion shows the number of issues of each severity - info, low, medium, high, and critical (from left to right). You can sort the assets, showing the most vulnerable or the least vulnerable first.
Each asset has a root asset that it’s associated with, as well as dates when it was first seen (discovered) and last seen.
You can also filter assets by tags.
In the bottom left corner, there’s also an option to switch between views of all assets, or active assets only. Attaxion considers an asset to be active if it has been seen within the last 7 days.
Note: This option is available only to users on paid plans.
You may also toggle the “Scalable assets” option to include non-scannable assets on the list.

What Can You Do From the “Assets” Tab
The main purpose of the assets tab is giving you the overview of the assets that constitute your organization’s external attack surface and allowing you to narrow the list down by filtering to get to a shorter list of assets that you are interested in.
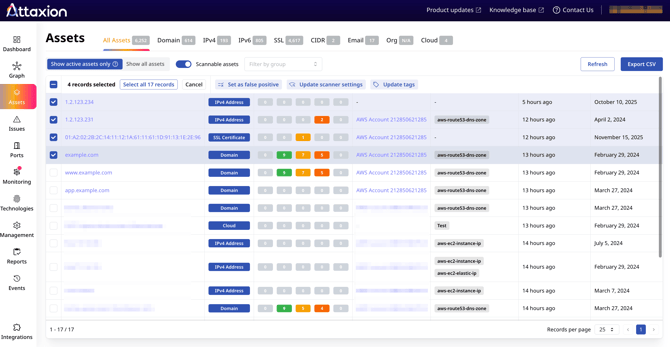
You can also mark multiple assets as false positives, update their scanner settings or tags. To do that, select the target assets and click “Set as false positive,” “Update scanner settings,” or "Update tags."
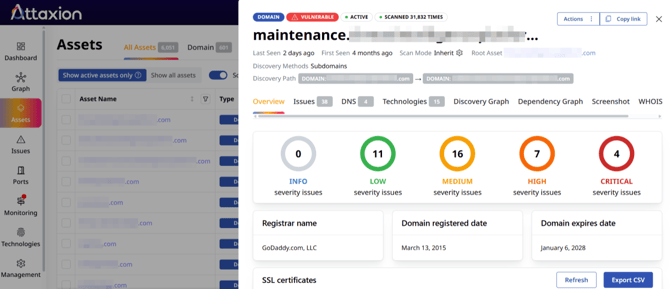
By clicking on an asset name in the list, you open a window with more detailed information on this particular asset.
You can also export a selection of assets as a CSV list. To do that, use filters to narrow down the list of assets to those you want to export, and then press “Export CSV” at the top right corner of the screen.