![ATX-resized_Prancheta 1-1.png]](https://support.attaxion.com/hs-fs/hubfs/ATX-resized_Prancheta%201-1.png?height=40&name=ATX-resized_Prancheta%201-1.png)
By default, Attaxion's scanner only sees what's publicly reachable. However, since many applications keep their most sensitive functionality — admin panels, account settings, internal tools — behind authentication, we’ve added the capability to perform authenticated scanning. This feature lets the scanner log in first so that it can find and test vulnerabilities on pages that unauthenticated scanning couldn’t reach.
Where to Find Authenticated Scanning
Authenticated scanning is configured individually for each asset, from the asset details page for a domain, IPv4, or IPv6 asset.
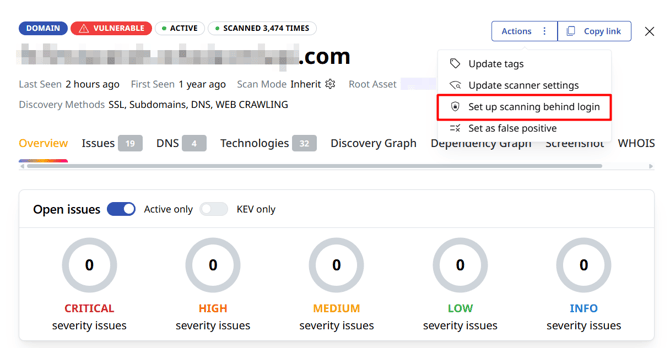
To configure authenticated scanning in Attaxion, open the asset, click “Actions” in the top-right corner, and select “Set up scanning behind login.”
How to See if Authenticaed Scanning Is Enabled
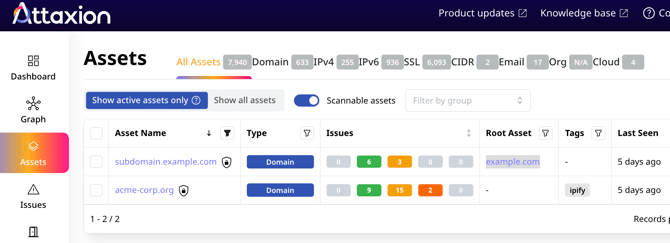
Assets where authenticated scanning has been enabled are marked with a lock icon in the "Assets overview" tab.
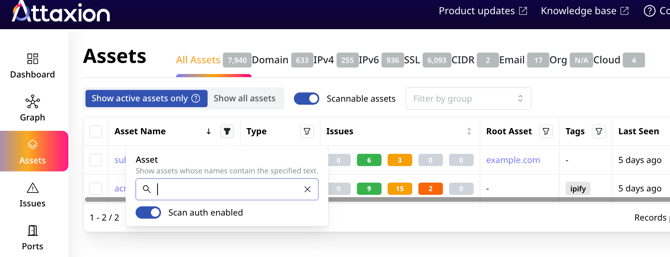
If you want to filter the list of assets so that only those with authenticated scanning enabled are visible, you can do so in the "Assets overview" view by clicking the filter icon next to the "Asset Name" field.
How to Configure Authenticated Scanning
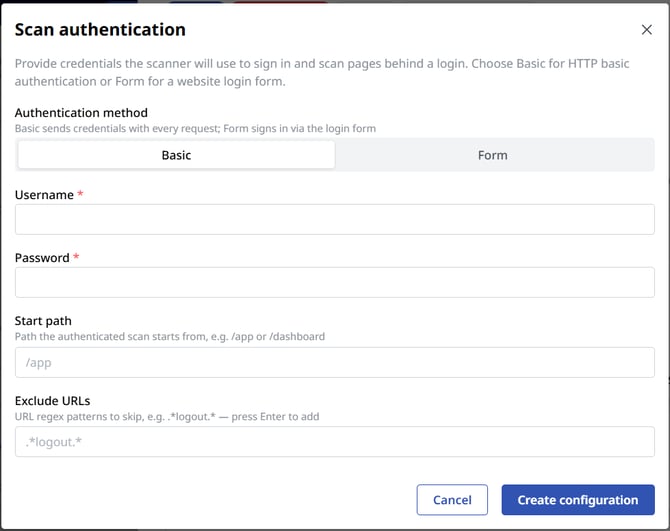
In the “Scan authentication” window that opens, choose an authentication method:
- Basic: This method sends your credentials with every request. Use this for pages protected by HTTP basic authentication.
- Form: This method signs in through the website's own login form, the way a real user would.
The fields you’ll need to fill in depend on the method you pick.
Basic Authentication Fields
- Username and password: The credentials the scanner will use during the scan. Both are required.
- Start path: The page the authenticated scan should begin from, such as /app or /dashboard. Optional.
- Exclude URLs: One or more regular-expression (regex) patterns for URLs the scanner should skip, such as .*logout.* This is useful for keeping the scanner from logging itself out mid-scan. The expressions are separated by commas. Optional.
Form Authentication Fields
Form authentication includes everything in Basic, plus three additional fields that the scanner needs to submit the login form:
- Login path: This is the page that contains the login form, such as /login or /auth/sign-in. Required.
- Login request data: The request body submitted to log in. Use the {%username%} and {%password%} placeholders where the credentials should go, e.g., username={%username%}&password={%password%}. Note that Attaxion substitutes the real values automatically. Required.
- Logged out indicator: The text or regex pattern that only appears when the session has been logged out, such as “Sign in.” This lets the scanner detect if it's been logged out so it can attempt to re-authenticate using the provided credentials to continue its work. Optional.
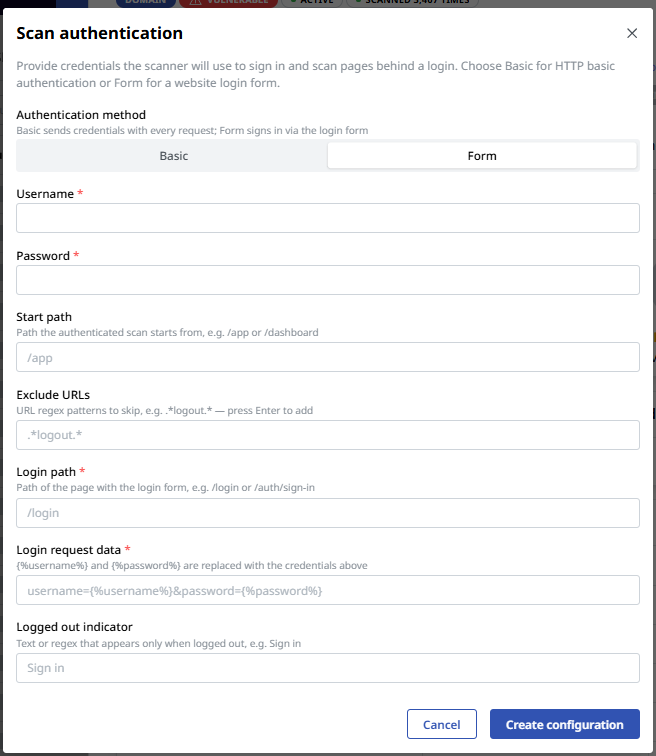
Once you're done, click “Create configuration” to save.
Note: Passwords are write-only. Once saved, they are never displayed or returned by Attaxion again, including when you reopen the configuration to edit it.
Managing an Existing Configuration
Once authenticated scanning is set up for an asset, a “Scan Auth” indicator appears in the asset details bar, showing which method is configured (Basic or Form).
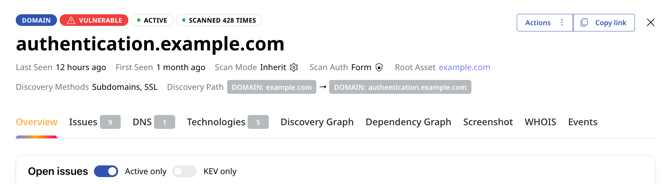
Click the “Scan Auth” indicator to enable, disable, or edit the configuration at any time.
When editing, the password field is left blank by default. Leave it blank to keep the current value, or enter a new one to replace it.
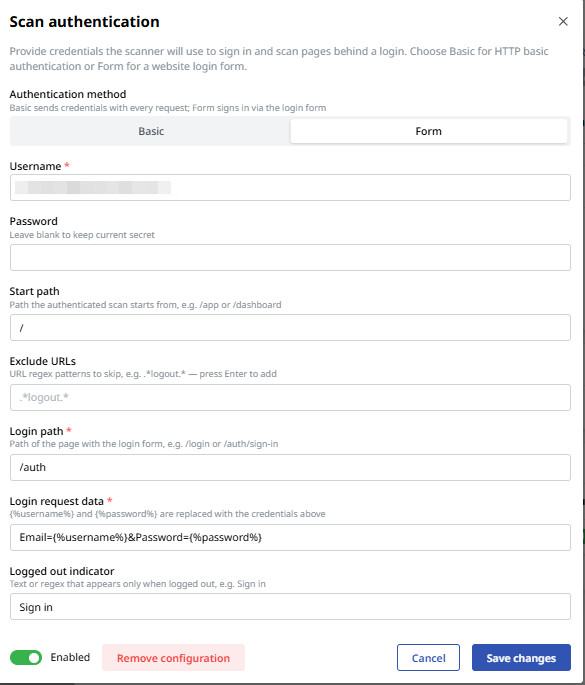
From this window, you can also toggle the configuration on or off with the “Enabled” switch or remove it entirely by clicking “Remove configuration.”